How to Scrape a Website that Requires Login with Python
In this article, we’ll go through a few examples of handling different types of authentication in Python. We’ll also look at common issues you might run into when scraping pages behind a login.
Prerequisites
You’ll need Python 3.11 or newer. The code hasn’t been tested on older versions, so it might not work with them.
We’ll use a few libraries like requests and BeautifulSoup. These aren’t included by default, so you will need to install them if you haven’t already:
pip install requests beautifulsoup4For more complex cases, we’ll use Selenium:
pip install seleniumAny library that supports a web driver will work, though.
We’ll also include one example using Scrapy:
pip install scrapyScrapy is a separate scraping framework. If you’ve never used it, check out our other article on Scrapy basics.
Basic Authentication
In this part, I’ll explain how basic authentication works without any extra protection. I’ll show two examples: sending data to a website and using an endpoint.
Sending Data to a Website
The simplest case is basic authentication through a login form: to verify your identity, you just need to send your username and password in a POST request, no tokens or extra protection involved:
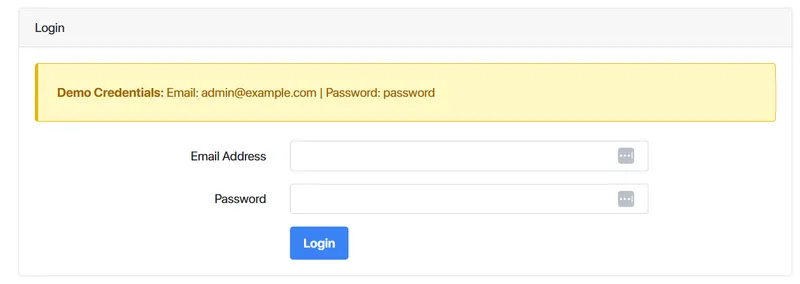
Here’s an example of a simple form that just takes a username and password as POST parameters. If you open DevTools and check the Network tab during login, you’ll see that those are the only values being sent:
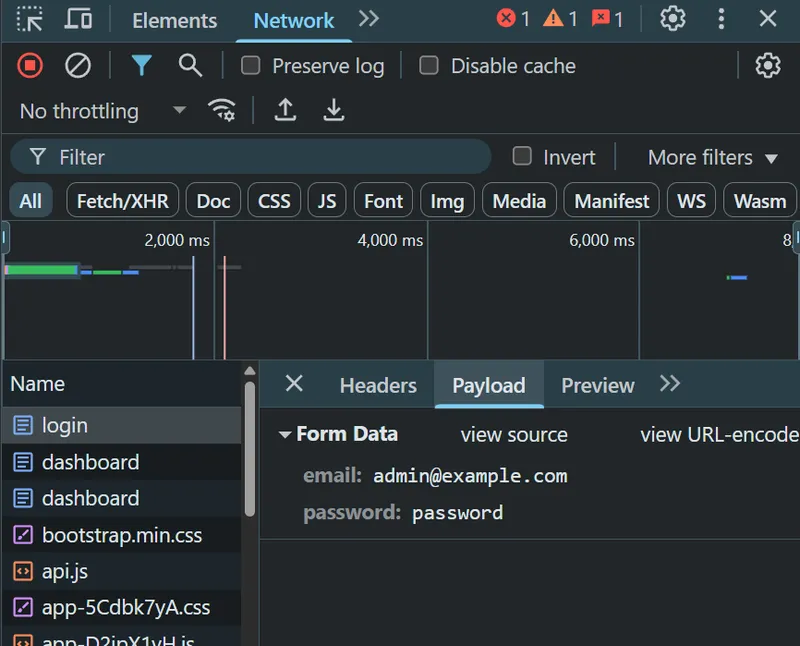
For a site like this, a simple library like requests is enough to log in and scrape the protected data:
import requests


login_url = "https://www.scrapingcourse.com/login"


payload = {
    'email': '[email protected]',
    'password': 'password'
}


response = requests.post(login_url, data=payload)


print(response.status_code)
But this will only get you through the login once. Most of the time, you’ll need to stay logged in while making multiple requests to scrape data from different pages.
To do that, you can use a session. Let’s update the script to store the login state in a session:
import requests


session = requests.Session()


login_url = "https://www.scrapingcourse.com/login"


response = session.get(login_url)
response.raise_for_status()


payload = {
    'email': '[email protected]',
    'password': 'password'
}


post_response = session.post(login_url, data=payload)
post_response.raise_for_status()
Now you can keep using that session to access other pages that require authentication:
protected_page = session.get("https://www.scrapingcourse.com/dashboard")In general, sites with this kind of minimal protection are rare. But if you find one, you can use another basic library for scraping: BeautifulSoup.
from bs4 import BeautifulSoupAfter you make the request, you can extract the data you need using CSS selectors:
soup = BeautifulSoup(protected_page.text, 'html.parser')


for product in soup.select(".product-item"):
    name = product.select_one(".product-name")
    price = product.select_one(".product-price")
    link_tag = product.select_one("a")
    image_tag = product.select_one("img")


    product_name = name.text.strip() if name else "N/A"
    product_price = price.text.strip() if price else "N/A"
    product_url = link_tag['href'] if link_tag else "N/A"
    product_image = image_tag['src'] if image_tag else "N/A"


    print(f"Name: {product_name}")
    print(f"Price: {product_price}")
    print(f"Product URL: {product_url}")
    print(f"Image URL: {product_image}")
    print("-" * 100)
Here’s the result:
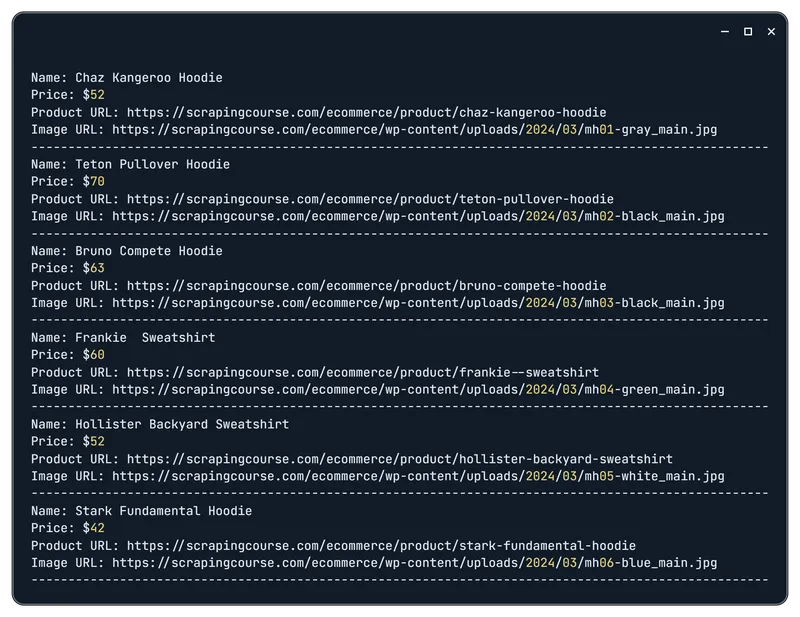
Full code example:
import requests
from bs4 import BeautifulSoup


session = requests.Session()


login_url = "https://www.scrapingcourse.com/login"


response = session.get(login_url)
response.raise_for_status()


payload = {
    'email': '[email protected]',
    'password': 'password'
}


post_response = session.post(login_url, data=payload)
post_response.raise_for_status()


protected_page = session.get("https://www.scrapingcourse.com/dashboard")


soup = BeautifulSoup(protected_page.text, 'html.parser')


for product in soup.select(".product-item"):
    name = product.select_one(".product-name")
    price = product.select_one(".product-price")
    link_tag = product.select_one("a")
    image_tag = product.select_one("img")


    product_name = name.text.strip() if name else "N/A"
    product_price = price.text.strip() if price else "N/A"
    product_url = link_tag['href'] if link_tag else "N/A"
    product_image = image_tag['src'] if image_tag else "N/A"


    print(f"Name: {product_name}")
    print(f"Price: {product_price}")
    print(f"Product URL: {product_url}")
    print(f"Image URL: {product_image}")
    print("-" * 100)
Even though Basic Auth is considered rudimentary, it remains widespread in API ecosystems, admin interfaces, and internal dashboards, especially when HTTPS is enforced. It’s easy to configure and integrates seamlessly with tools like curl, requests, or any HTTP client.
Using an API Endpoint
Let’s look at a more realistic example of basic authentication, specifically, making a request to an endpoint that expects auth credentials.
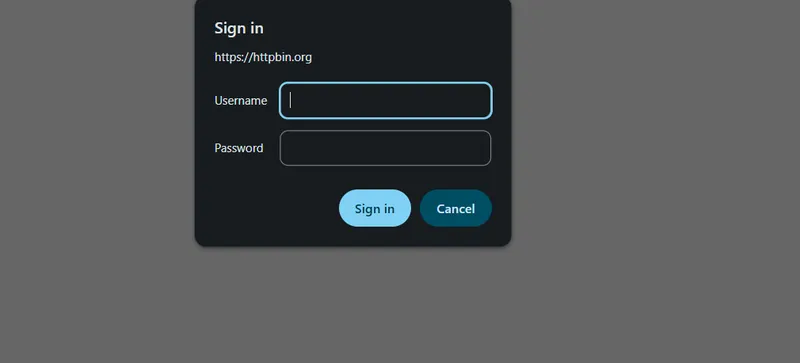
We’ll use the same requests library for this:
import requestsIn this case, we’re using an endpoint where we define the correct username and password ourselves:
https://httpbin.org/basic-auth/{user}/{passwd}For example:
url = "https://httpbin.org/basic-auth/name/pass" Then we send a GET request with the correct credentials and print the result:
response = requests.get(url, auth=("name", "pass"))
print("Status Code:", response.status_code)
print("Response JSON:", response.json())
The response looks like this:

Now let’s see what happens if we send the wrong credentials:
bad_response = requests.get(url, auth=("name", "wrongpass"))
print("Status Code (failed):", bad_response.status_code)
Since a failed auth attempt doesn’t return any data, we won’t try to print anything like we did with the successful response. Instead, we’ll just show the status code:

Here’s the full code for the example:
import requests

url = "https://httpbin.org/basic-auth/name/pass"

response = requests.get(url, auth=("name", "pass"))
print("Status Code:", response.status_code)
print("Response JSON:", response.json())

bad_response = requests.get(url, auth=("name", "wrongpass"))
print("Status Code (failed):", bad_response.status_code)
This is the typical form of basic authentication you’ll most likely run into.
CSRF Token Authentication
In more complex authentication cases, the server generates a random token (like a CSRF token) that you need to send along with your login and password. The server checks this token with every request, and if it’s missing or incorrect, the request gets rejected.
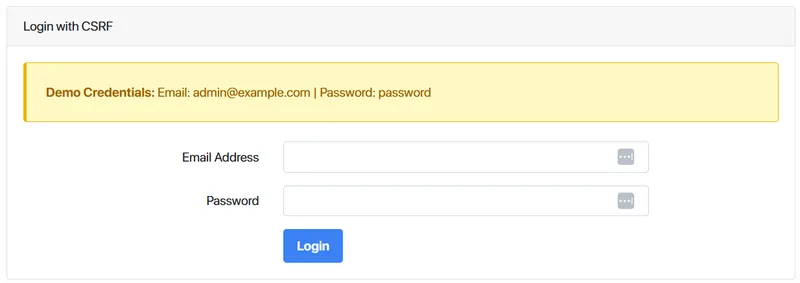
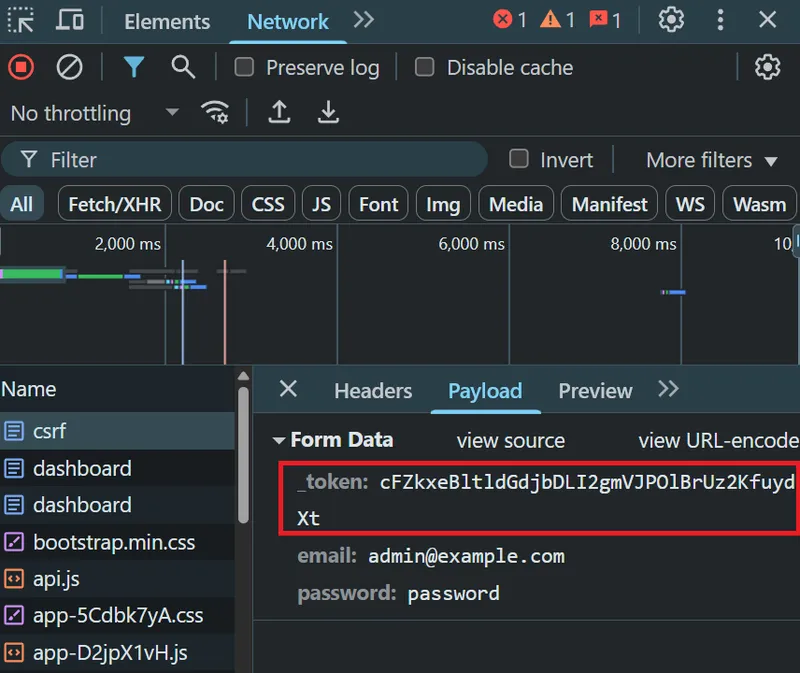
This will still be a POST request with the same parameters as in the previous example, but now we’ll include the token. Open DevTools and go to the Network tab, just like before:
You can usually find the token on the page, inside a hidden input field:
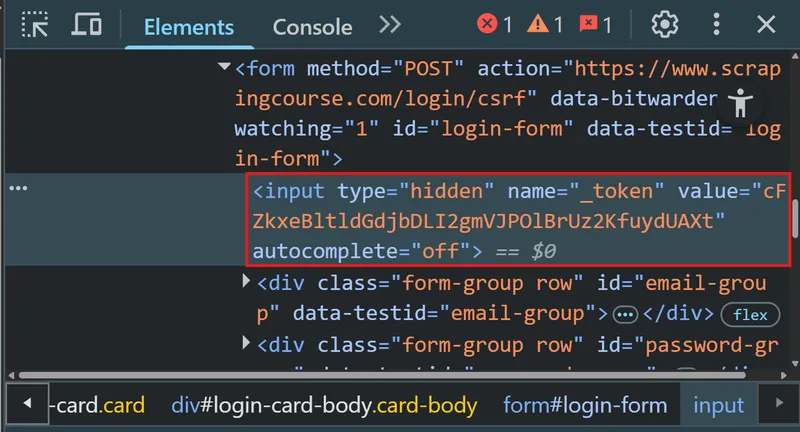
So the example stays basically the same. The only difference is that before sending the request, we need to grab the token from the page and pass it as one of the parameters:
soup = BeautifulSoup(response.text, 'html.parser')
csrf_token = soup.select_one("input[name='_token']")['value'] if soup.select_one("input[name='_token']") else None


payload = {
    'email': '[email protected]',
    'password': 'password',
    '_token': csrf_token
}
Other than that, the code doesn’t change. We’ll still get the data we need in the response:
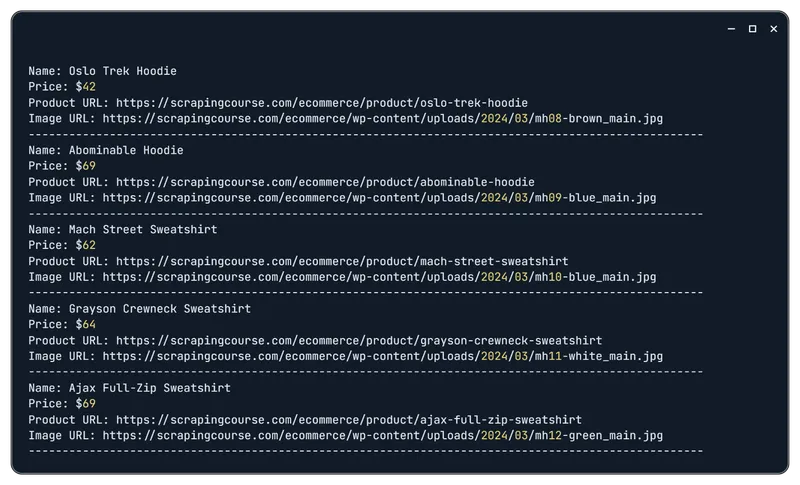
Here’s the full code:
import requests
from bs4 import BeautifulSoup

session = requests.Session()

login_url = "https://www.scrapingcourse.com/login"

response = session.get(login_url)
response.raise_for_status()

soup = BeautifulSoup(response.text, 'html.parser')
csrf_token = soup.select_one("input[name='_token']")['value'] if soup.select_one("input[name='_token']") else None

payload = {
    'email': '[email protected]',
    'password': 'password',
    '_token': csrf_token
}

post_response = session.post(login_url, data=payload)
post_response.raise_for_status()

protected_page = session.get("https://www.scrapingcourse.com/dashboard")
protected_page.raise_for_status()

soup = BeautifulSoup(protected_page.text, 'html.parser')

for product in soup.select(".product-item"):
    name = product.select_one(".product-name")
    price = product.select_one(".product-price")
    link_tag = product.select_one("a")
    image_tag = product.select_one("img")

    product_name = name.text.strip() if name else "N/A"
    product_price = price.text.strip() if price else "N/A"
    product_url = link_tag['href'] if link_tag else "N/A"
    product_image = image_tag['src'] if image_tag else "N/A"

    print(f"Name: {product_name}")
    print(f"Price: {product_price}")
    print(f"Product URL: {product_url}")
    print(f"Image URL: {product_image}")
    print("-" * 100)
I recommend this dynamic approach, always extract the token at runtime instead of hardcoding it. Tokens can change, and a hardcoded value will eventually break.
WAF (Web Application Firewall) Authentication
The last and most difficult case is when a WAF (Web Application Firewall) adds extra protection. That includes:
- Two-Factor Authentication (2FA). After entering a username and password, you also need to enter a code sent to your device (via SMS or an authenticator app).
- CAPTCHA during login. The server asks the user to prove they’re not a bot by solving a CAPTCHA challenge.
- JavaScript Challenges. Some sites, especially behind Cloudflare, require the client to run JS to prove it’s a real browser, not a bot.
- OAuth or OpenID Connect. In this case, the server redirects the user to an external service (like Google or Facebook) for authentication. After that, the server returns a token used for further requests.
- IP blocking and geofiltering. Some sites block requests from suspicious or unauthorized IPs or entire regions. If your IP doesn’t match the allowed range, requests get denied.
Some of these protections can be bypassed (e.g., IP filters via proxies). Others, like OAuth, OpenID Connect, or 2FA, can’t really be bypassed; you just have to go through them.
Other mechanisms only trigger if the site thinks you’re acting like a bot. You can avoid those by mimicking real user behavior.
There are a few Python libraries that are less likely to get flagged as bots:
- Undetected ChromeDriver. A modified ChromeDriver that hides automation signals, helping bots bypass anti-bot defenses and avoid detection.
pip install undetected-chromedriver- SeleniumBase. SeleniumBase UC Mode makes bots look like real users by bypassing bot detection and CAPTCHAs. UC Mode is based on undetected-chromedriver.
pip install seleniumbase- Selenium Stealth. A Python library that adjusts Selenium browser fingerprints to better mimic real users and hide that it’s automated.
pip install selenium-stealthPick what fits your project. We’ll use the second option listed above: SeleniumBase in UC mode.
Bypassing WAF with SeleniumBase
Import the library into your project and set up the variables:
from seleniumbase import SB

login_url = "https://www.scrapingcourse.com/login/cf-antibot"

email = "[email protected]"
password = "password"
To reduce bot detection risk, we use uc=True:
with SB(uc=True) as sb:Now open the site and handle CAPTCHA with a GUI-based click:
    sb.uc_open_with_reconnect(login_url, reconnect_time=6)
    sb.uc_gui_click_captcha()
The rest of the logic stays close to the previous examples, but now uses Selenium:
    sb.type('input[name="email"]', email)
    sb.type('input[name="password"]', password)
    sb.click('button[type="submit"]')

    sb.wait_for_element(".product-item", timeout=10)

    products = sb.find_elements("div.product-item")

    for product in products:
        name = product.text.split('\n')[0] if product.text else "N/A"
        price = product.find_element("css selector", ".product-price").text if product.find_elements("css selector", ".product-price") else "N/A"
        product_url = product.find_element("tag name", "a").get_attribute('href') if product.find_elements("tag name", "a") else "N/A"
        image_url = product.find_element("tag name", "img").get_attribute('src') if product.find_elements("tag name", "img") else "N/A"

        print(f"Name: {name}")
        print(f"Price: {price}")
        print(f"Product URL: {product_url}")
        print(f"Image URL: {image_url}")
        print("-" * 100)
And that’s how you get the same kind of data, even from a page behind heavy protection.
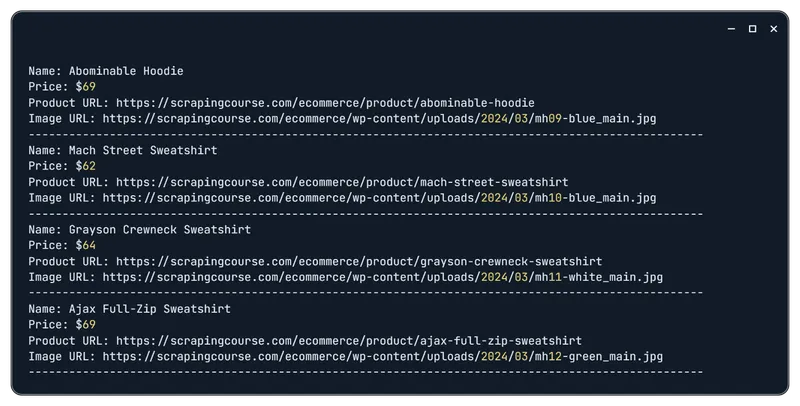
Here’s the full code:
from seleniumbase import SB

login_url = "https://www.scrapingcourse.com/login/cf-antibot"

email = "[email protected]"
password = "password"

with SB(uc=True) as sb:
    sb.uc_open_with_reconnect(login_url, reconnect_time=6)
    sb.uc_gui_click_captcha()

    sb.type('input[name="email"]', email)
    sb.type('input[name="password"]', password)
    sb.click('button[type="submit"]')

    sb.wait_for_element(".product-item", timeout=10)

    products = sb.find_elements("div.product-item")

    for product in products:
        name = product.text.split('\n')[0] if product.text else "N/A"
        price = product.find_element("css selector", ".product-price").text if product.find_elements("css selector", ".product-price") else "N/A"
        product_url = product.find_element("tag name", "a").get_attribute('href') if product.find_elements("tag name", "a") else "N/A"
        image_url = product.find_element("tag name", "img").get_attribute('src') if product.find_elements("tag name", "img") else "N/A"

        print(f"Name: {name}")
        print(f"Price: {price}")
        print(f"Product URL: {product_url}")
        print(f"Image URL: {image_url}")
        print("-" * 100)
In most cases, this approach works well for sites you want to scrape, as it simulates real user behavior.
Login on a Real Site
Let’s take a real website instead of a test one and adapt our previous code for HasData.
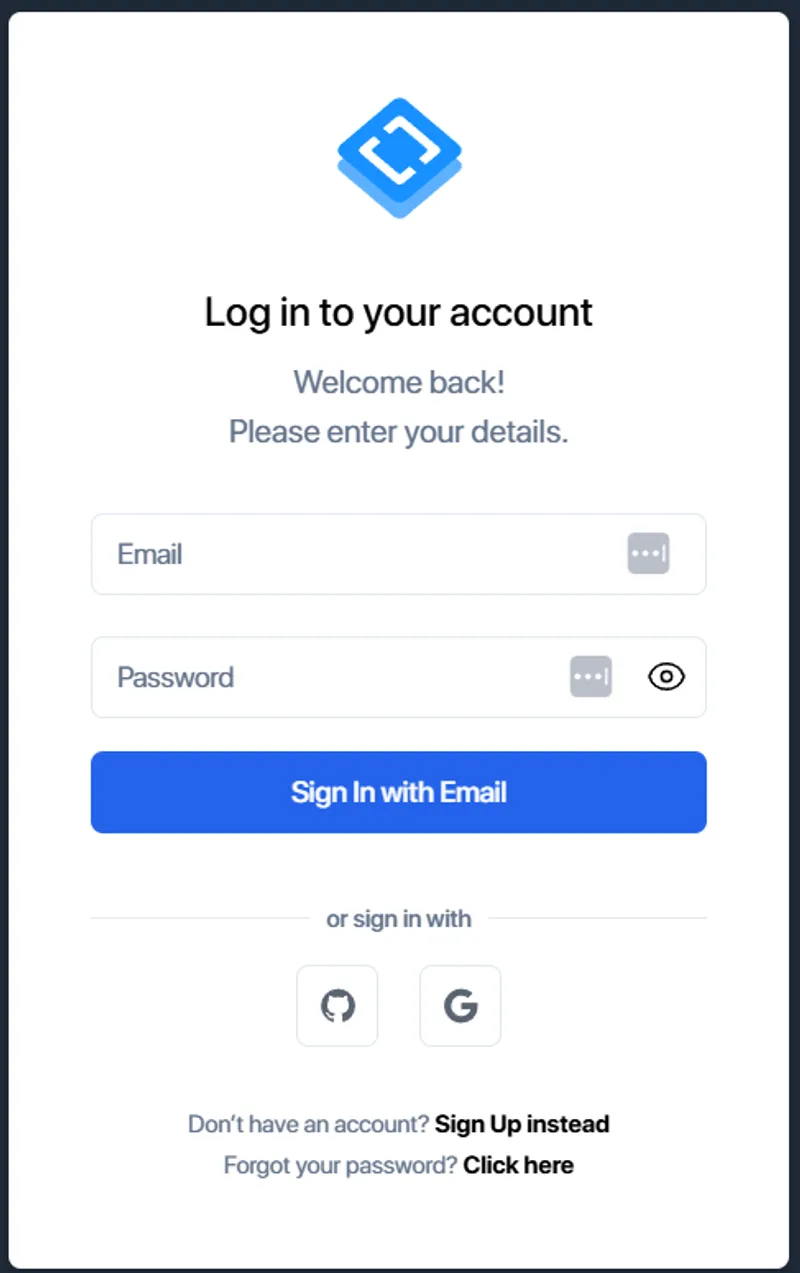
The login block will mostly stay the same, only the input and button field selectors will change:
from seleniumbase import SB
from selenium.webdriver.common.by import By


with SB(uc=True) as sb:
    sb.open("https://app.hasdata.com/sign-in")
    sb.type('input[name="email"]', "YOUR-EMAIL")
    sb.type('input[name="password"]', "YOUR-PASSWORD")
    sb.click('button:contains("Sign In with Email")')
After that, you can go to any page you need (for example, the marketplace page) and scrape the data.
First, figure out which tags contain the data you want, like this:
    sb.wait_for_element("div.items-center", timeout=10)
    sb.click('a[href="/marketplace"]')

    sb.wait_for_element("ul.place-content-stretch > li", timeout=10)

    reviews = sb.find_elements("css selector", "ul.place-content-stretch > li")
    for r in reviews:
        divs = r.find_elements(By.CSS_SELECTOR, "div")
        print(divs[0].text.strip().split('\n')[0])
Here’s how it works in practice:
So, you’ll get a list of available no-code scrapers:
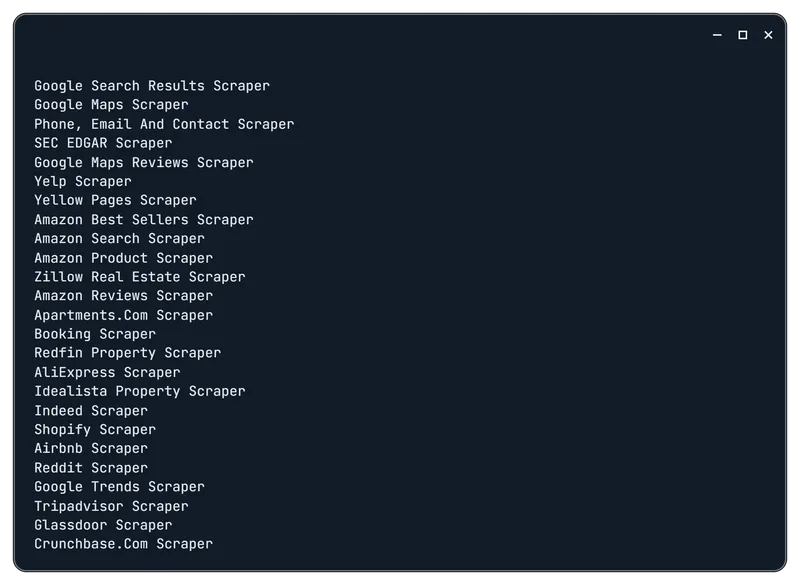
If this seems too complicated, you can use these no-code scrapers or scraping APIs that handle CAPTCHAs, blocks, and more for you.
Authentication with reCAPTCHA v2
The hardest type of authentication is when a CAPTCHA needs to be solved before continuing. As an example, we’ll use a demo site that asks you to fill in two fields, solve a CAPTCHA, and click a button. It’s very similar to a real authentication flow.
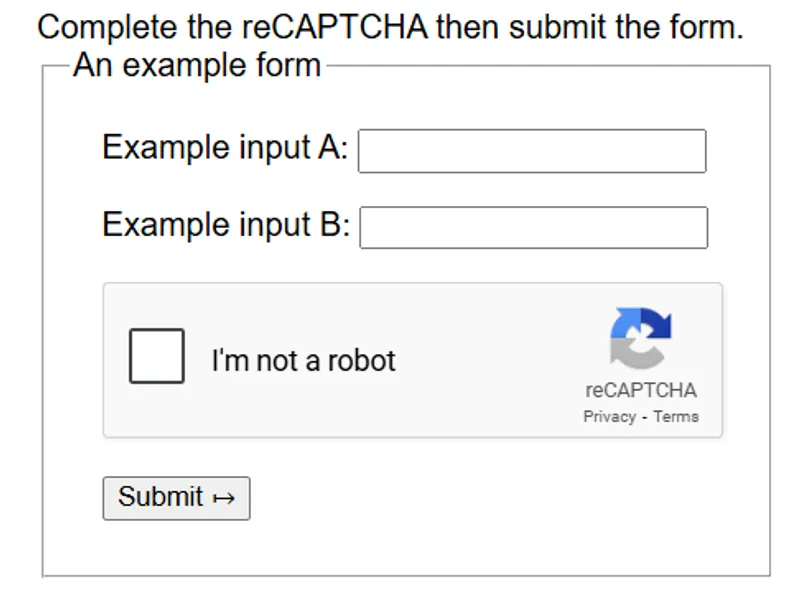
There are a few ways to deal with CAPTCHAs:
- Use CAPTCHA-solving services. You send them the site key and URL, and they return a token after solving it (usually by a human or a bot). You then insert the token into the form.
- Reuse the token. Sometimes the token you get after solving a CAPTCHA can be reused multiple times.
- Look for workarounds. For example, you can use a browser extension or an API from the target service to get the needed data without triggering a CAPTCHA at all.
Keep in mind, some CAPTCHAs aren’t visible (like reCAPTCHA v2 invisible). In those cases, mimicking real user behavior can be enough to bypass them.
Let’s look at an example using a browser extension to solve reCAPTCHA v2 and the SeleniumBase library to mask the bot.
First, download any CAPTCHA-solving extension from the Chrome Web Store in .crx format. Convert it to .zip, unzip it, and set the path to the folder in your script:
from seleniumbase import SB

extension_path = "captcha"
To load the extension when launching the browser, use the extension_dir parameter:
with SB(uc=True, extension_dir=extension_path) as sb:Then enter the login and password, and submit the form:
    sb.open("https://recaptcha-demo.appspot.com/recaptcha-v2-checkbox.php")
    sb.type('input[name="ex-a"]', "my_username")
    sb.type('input[name="ex-b"]', "my_password")
    sb.click('button[type="submit"]')
The script will look like this when running:
Full code:
from seleniumbase import SB

extension_path = "captcha"

with SB(uc=True, extension_dir=extension_path) as sb:
    sb.open("https://recaptcha-demo.appspot.com/recaptcha-v2-checkbox.php")
    sb.type('input[name="ex-a"]', "my_username")
    sb.type('input[name="ex-b"]', "my_password")
    sb.click('button[type="submit"]')
This method won’t work for every CAPTCHA type. So if you want to scrape data without using solving services, be ready to hit some walls. Most likely, you’ll still need to rely on CAPTCHA-solving APIs.
Using Scrapy’s FormRequest for Authentication
If you’re working with large amounts of data or just prefer the Scrapy framework, you can use FormRequest for login.
We’ll skip setting up a Scrapy project and focus directly on the spider code. If you’ve never used Scrapy and don’t know how to create a spider, check out our separate article on that.
First, let’s set some basic parameters like the spider name and the target URL:
import scrapy
from scrapy.http import FormRequest


class TestLoginSpider(scrapy.Spider):
    name = 'test_login'
    start_urls = ['URL']


    # Here will be your code
Then you can send the login form using FormRequest.from_response:
    def parse(self, response):
        return FormRequest.from_response(
            response,
            formdata={
                'login': 'username',
                'password': 'password'
            },
            callback=self.after_login
        )
After that, define what happens after the form is submitted, for example, check if the login was successful:
    def after_login(self, response):
        if "username" in response.text:
            self.logger.info("Login successful")
        else:
            self.logger.error("Login failed")
            return


        yield scrapy.Request(
            url='new_URL',
            callback=self.parse_protected
        )
If login fails, we log an error. If it works, we move on to a protected page:
    def parse_protected(self, response):
        self.logger.info("Now on protected page")
That’s where you can add your scraping logic.
Here’s the full code:
import scrapy
from scrapy.http import FormRequest


class TestLoginSpider(scrapy.Spider):
    name = 'test_login'
    start_urls = ['URL']


    def parse(self, response):
        return FormRequest.from_response(
            response,
            formdata={
                'login': 'username',
                'password': 'password'
            },
            callback=self.after_login
        )


    def after_login(self, response):
        if "username" in response.text:
            self.logger.info("Login successful")
        else:
            self.logger.error("Login failed")
            return


        yield scrapy.Request(
            url='new_URL',
            callback=self.parse_protected
        )


    def parse_protected(self, response):
        self.logger.info("Now on protected page")
Compared to earlier examples, FormRequest.from_response automatically fills in hidden fields like CSRF tokens, so you only need to provide the login and password. This can make the authentication process much easier when scraping.
If the form is loaded dynamically with JavaScript, though, you may need to extract the tokens manually and include them in the request.
Cookie Reuse
To avoid logging in every time, you can reuse cookies, just keep in mind that they usually don’t live long.
If you’re using requests and sessions like in the earlier example, you can save and load cookies with pickle:
import pickleSave cookies:
with open("cookies.pkl", "wb") as f:
    pickle.dump(session.cookies, f)
Load cookies:
with open("cookies.pkl", "rb") as f:
    session.cookies.update(pickle.load(f))
If you’re using Selenium, you can get cookies like this:
cookies = driver.get_cookies()And reuse them:
for cookie in cookies:
    driver.add_cookie(cookie)
Just don’t forget to check the expiration if you’re reusing them later.
Conclusion
On most sites offering product, service, or job data, certain information is only available after successful authentication. As a result, handling login in Python during scraping is a common task.
From my experience, if you have the option to work through an API, that’s your best bet. It’s the easiest and most efficient approach. If not, be prepared for the fact that on real-world sites, basic authentication methods won’t be enough to get you through.
For authentication, you’ll likely need libraries like SeleniumBase, UndetectedBrowser, and others to hide the fact that you’re using code to scrape data.


